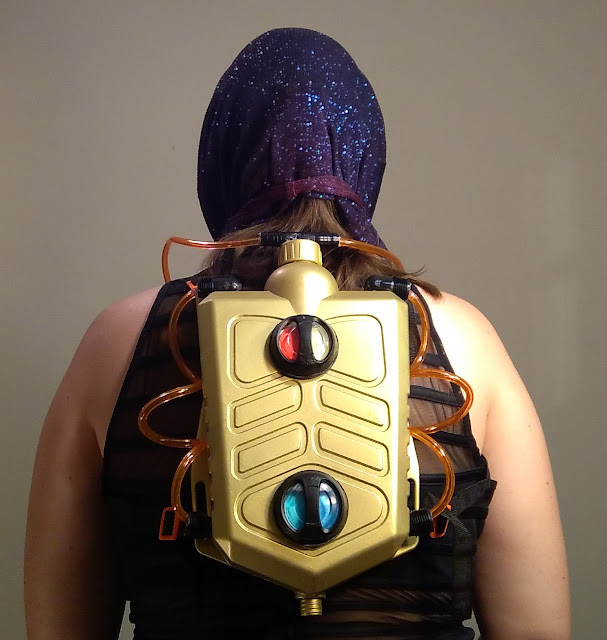
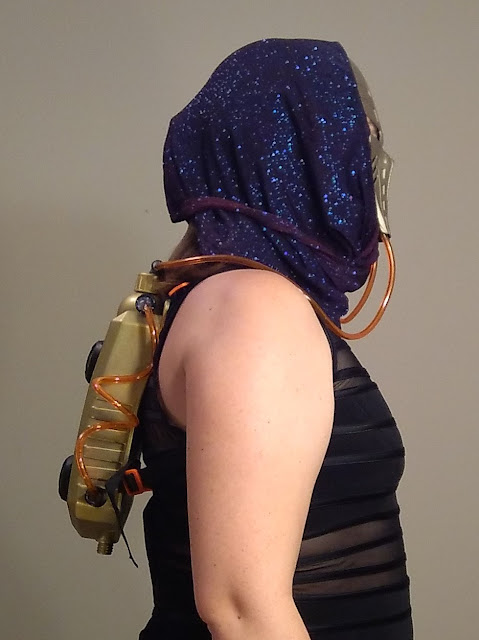
How to make a raypunk-style breathing apparatus
When traveling to other planets it helps to have a few gadgets on hand. And for a few places lacking breathable atmosphere, a life support pack can be pretty useful. For the raypunk aesthetic there is a fair amount of creative license taken to create spacesuits, rocketpacks, and other "space" gear. So I decided to make life-support breathing apparatus using a cheap backpack-mounted water pistol, irrigation parts, air fresheners, and some tubing. With a few modifications and additions you can easily make it into more of a rocket-pack or similar.
Materials
-Backpack water gun
-Two 1/2 inch barbed x 1/2 inch MNPT irrigation swing pipe elbows
-Two 1/2 inch barb x 1/2 inch male pipe thread irrigation swing pipe couplings
-One 1/2 inch barbed irrigation swing pipe tee
-2 car-mountable air fresheners
-Fuel line vinyl tubing
-Gold spray paint
-Black spray paint
-Clear coat sealer
-Coaxial cable clips
Tools
-Dremel tool
-Scissors
-Superglue
-Hot glue gun
1. Gather the materials
The main ingredient is the backpack water gun, which I picked up for $5 at a Five Below. The rest of these materials can be picked up for cheap at a hardware store. In the plumbing section, specifically the area for sprinkler systems and similar, you can find the vinyl tubing and irrigation parts (swing pipe elbows, pipe couplings, and tee). In the electrical section were the coaxial cable clips. And even these Refresh air fresheners were found at the hardware store, though I've also seen these models in dollar stores as well.
2. Prep the pack
First I removed the squirt gun attachment, which is neat but not quite what I was thinking of for this project. The pack here is my idea of something that could store and recycle breathable air, and possibly contain other life-saving equipment like water and food.
Next I punched and carved out the holes with my Dremel tool. The holes should be about 1/2 inch wide, just large enough to allow the sprinkler parts to fit snugly. Drill two at the top of the shoulders and one in the topmost cap.
And then drill holes on either side of the tank in the lowermost corners.
3. Paint the pack
Next I painted the tank with gold spray paint. This took several coats for complete coverage.
The end result is pretty nice, just be sure to finish with clear coat sealer to help the paint resist flaking.
4. Make the gauges
Next it helps to have some widgets on the pack to look like it could measure air supply or ambient conditions. Originally I figured I would use cast-off pressure gauges, but I realized they don't really look futuristic on their own. But I did find some nifty dual-scented air fresheners that are a bit more abstract and colorful. They don't have any marking to tell you much, but they sure look cool. So first dissemble the air fresheners.
Trim the oversize tab off with a pair of scissors, that way it doesn't stick out or make it easy to open the scent packets. Unless you want your life support system to smell like a car freshener it's best to keep the packets sealed.
And as always remove any stickers!
And to be sure that the back of the air fresheners have a more or less flat back to fit well to the tank, I carved off the projecting clips with a Dremel and finishing with a little sanding. Not the neatest job but since this won't be seen it's not too much of a concern.
For the covers, you need first need to disguise the lettering and symbols that make it look like an air freshener. The symbols on this are imprinted rather than raised, so simple sanding is not going to help. I ended up adding layers of craft glue on top, letting it dry, and the applying more to obscure what was beneath. But probably the best method is to apply some Bondo body filler, let dry, and sand down the excess. Sadly I did not think of this until afterwards. No matter, the glue more or less worked. A few coats of black spray paint and clear coat sealer also helps.
Finally put the pieces of the air freshener back together. I added a few drops of superglue to keep it in one piece.
5. Attach the side tubing and gauges
Insert the sprinkler parts into their preferred holes. I chose to put the swing pipe elbows at the top of the tank's shoulders, and the swing pipe couplings at the bottom corners. These fit very well, so I didn't even need glue to keep them in place.
Next cut about two length of 14 inch long tubing. I chose the orange because it's the only color not represented in the air fresheners, and I wanted to make it as ridiculously colorful as possible. Stylized space gear after all, none of that gritty stuff for this build. Then I applied hot glue around one end of the tubing and fitted it into the sprinkler elbow, filling any gaps with more hot glue.
Once dry I repeated the trick with the other end of the tubing and the coupling.
So here's what it looks like when they're in place.
6. Attach the mask tubing
First cut two lengths of tubing, each about 20 inches long when stretched out. Then get out the mask and two coaxial cable clips. The clips are very useful, just the right size for this tubing and enables you to attach and remove the tubing as convenient. For attaching the clips themselves, first remove the nails in the clips.
Then use hot glue to attach the clips to the inside of the mask.
Hot-glue the lengths of tubing into the swing pipe tee, then use hot glue to fix the tee into the top of the pack.
Then when ready to clip the loose ends of the tubing into the clips in the mask.
And there you have it, an interesting looking life-support apparatus. Good luck and keep crafting!


Comments
Post a Comment